
cfhtmltopdf tag running on ColdFusion 2023.The orientation attribute is ignored.
<cfhtmltopdf orientation="landscape">
<h3>Test Landscape Output</h3>
</cfhtmltopdf>
With SMTP Relay being increasingly phased out within Office/Exchange 365 I decided to migrate some of our application email to Microsoft Graph.
In order to use Microsoft Graph API to send email you’ll need to have an Exchange 365 account and a licensed user/inbox.
To access the Microsoft Graph API your program will need to authenticate itself using OAuth.
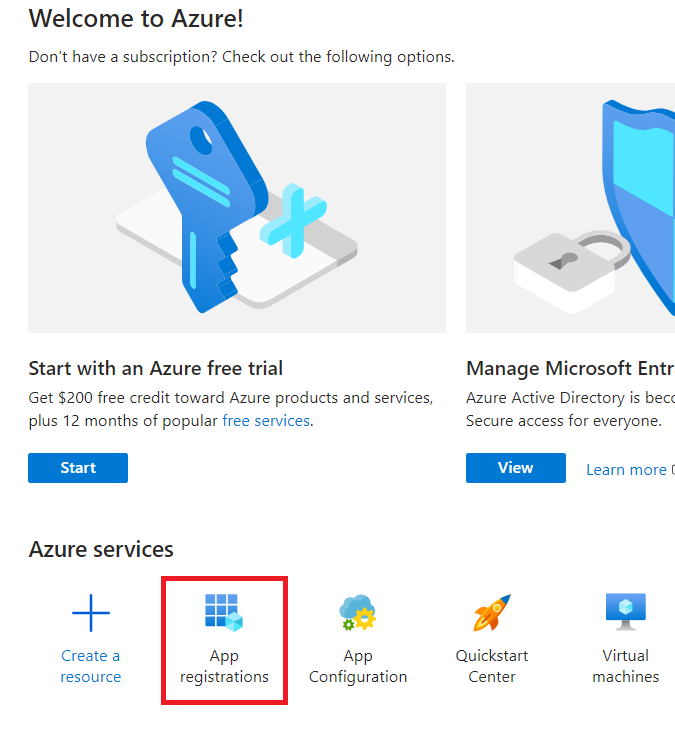
The first step is to register your application in Azure AD.
Open the Azure AD Portal: https://portal.azure.com/
Click App Registrations.
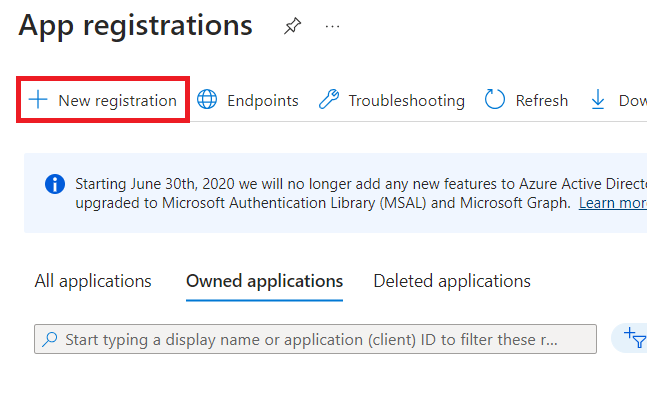
Click New registration.
Enter the Name of your application. Leave everything else default.
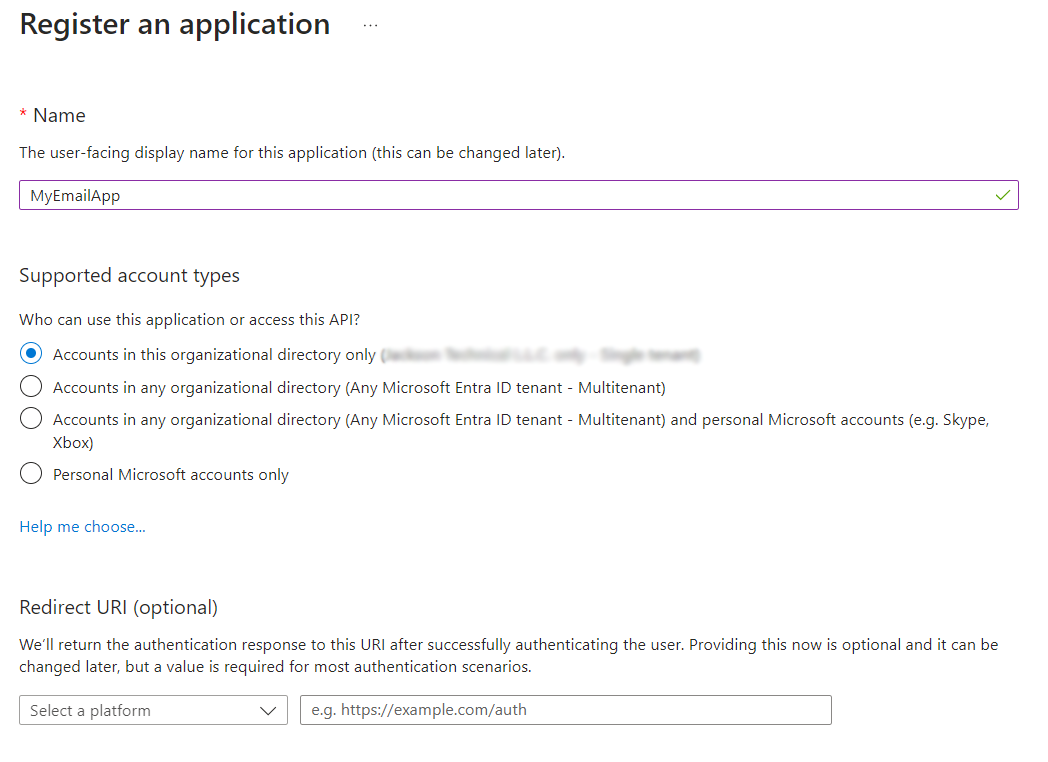
Click Register.
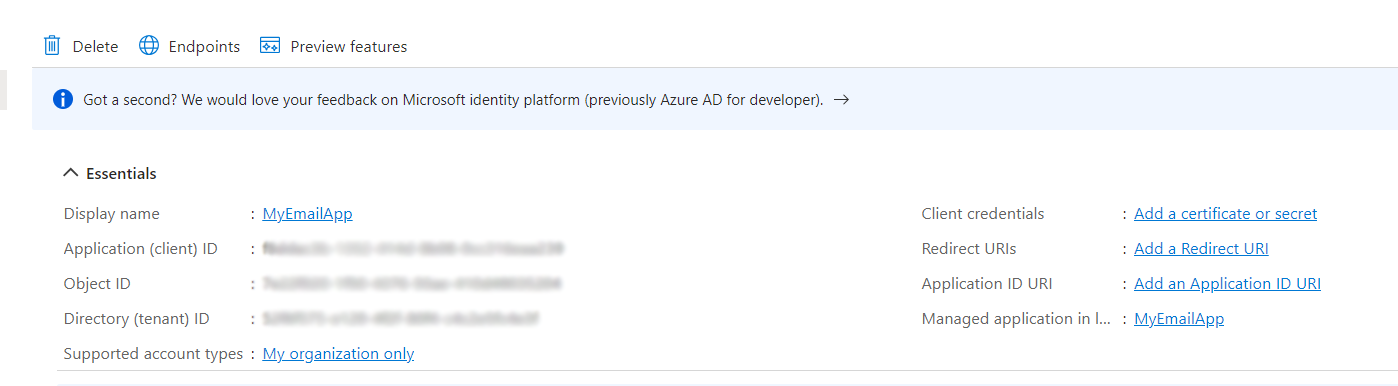
After registering your application, write down the Application (client) ID and the Directory (tenant) ID.
We now need to create a “secret” for generating OAuth access tokens.
Click Certificates & secrets.

Click New client secret.
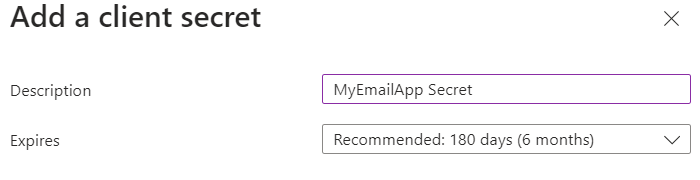
Enter a Description and select an Expires value.
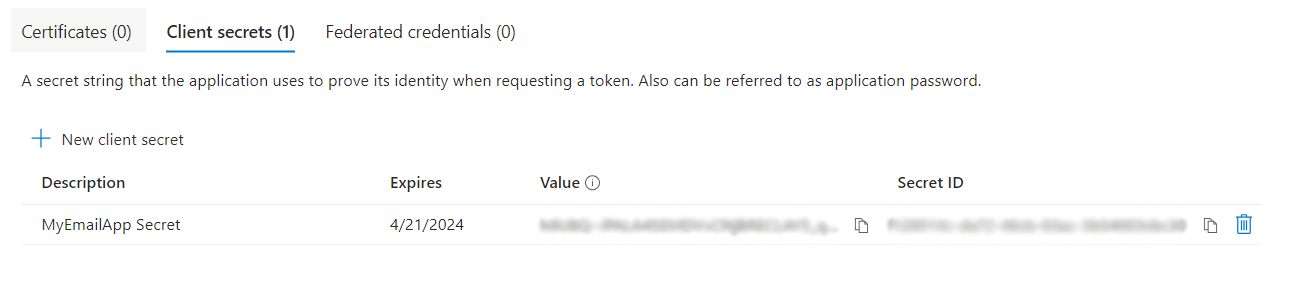
Click Add.
Write down the Value immediately because it will only be displayed once.
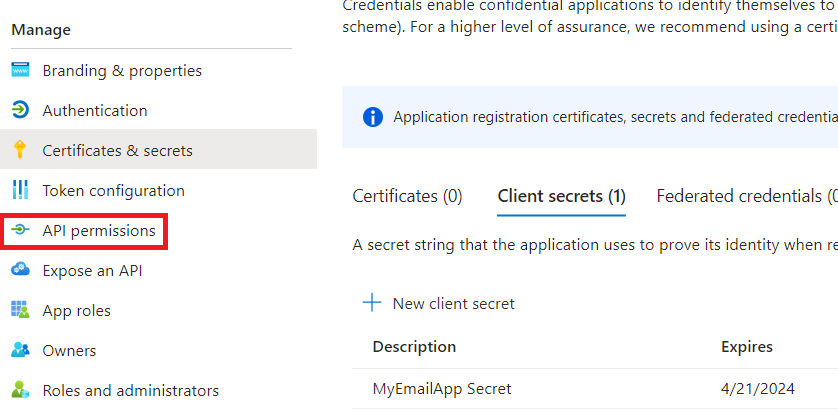
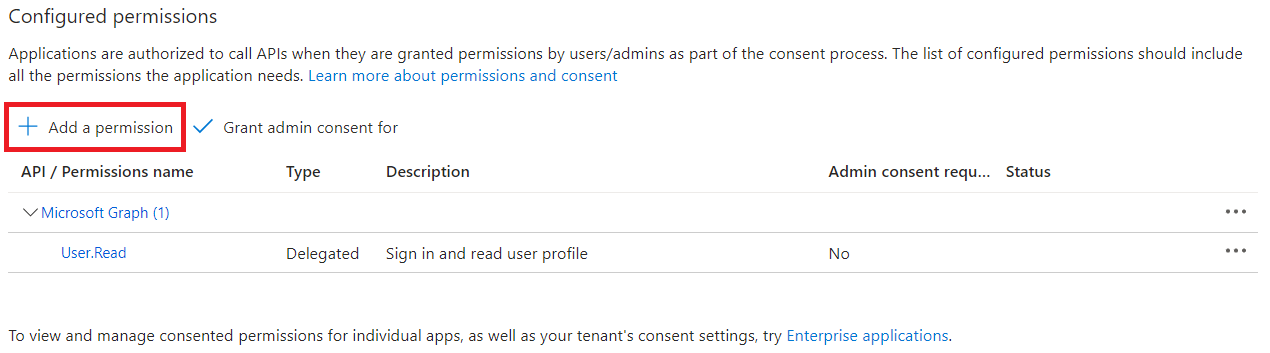
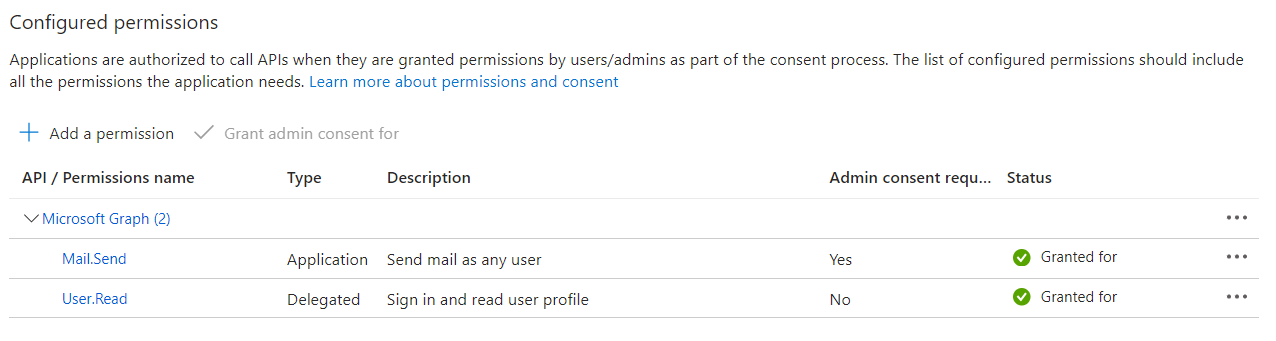
Now we need to assign the app the appropriate API permissions.
Click API permissions.
Click Add a permission.
Microsoft Graph.
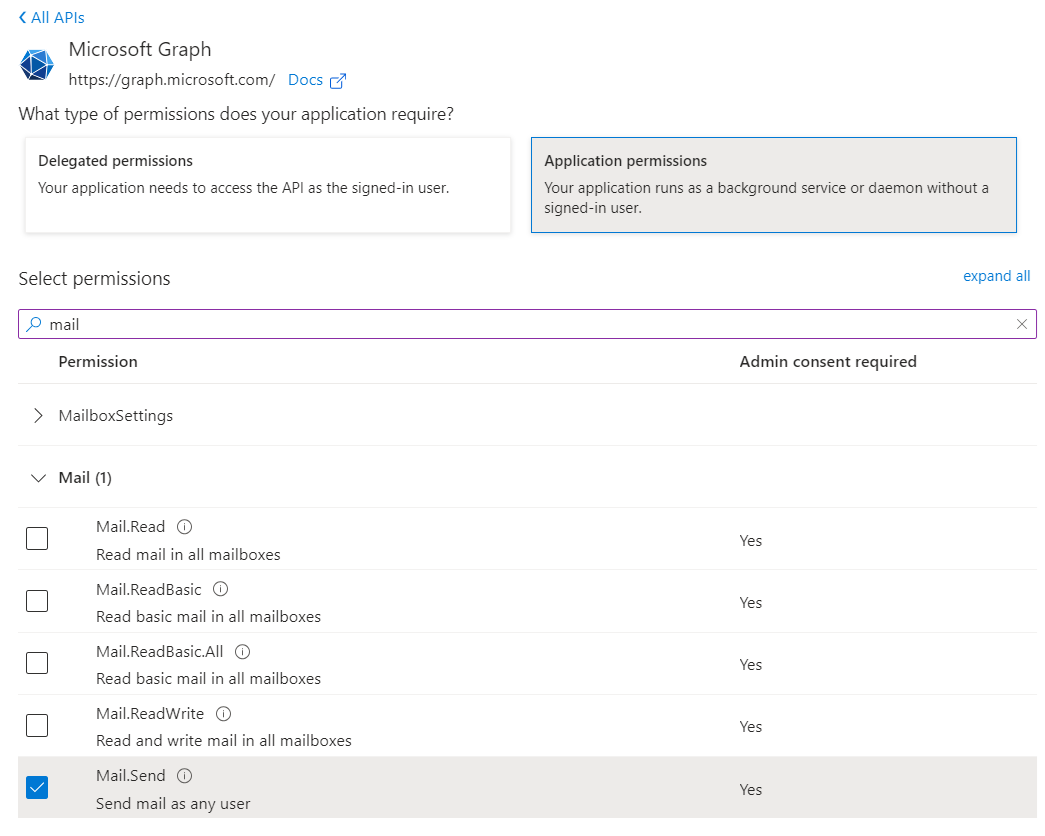
Application permissions.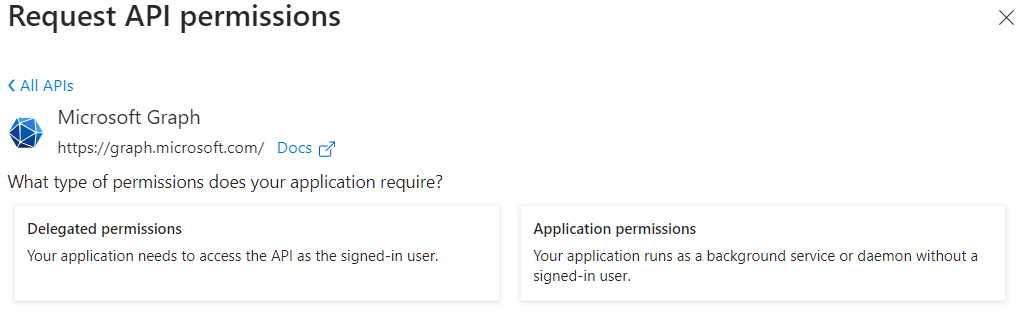
Search for Mail and select Mail.Send.
Click Add permissions.
An administrator will need to grant the permission for the entire organization.
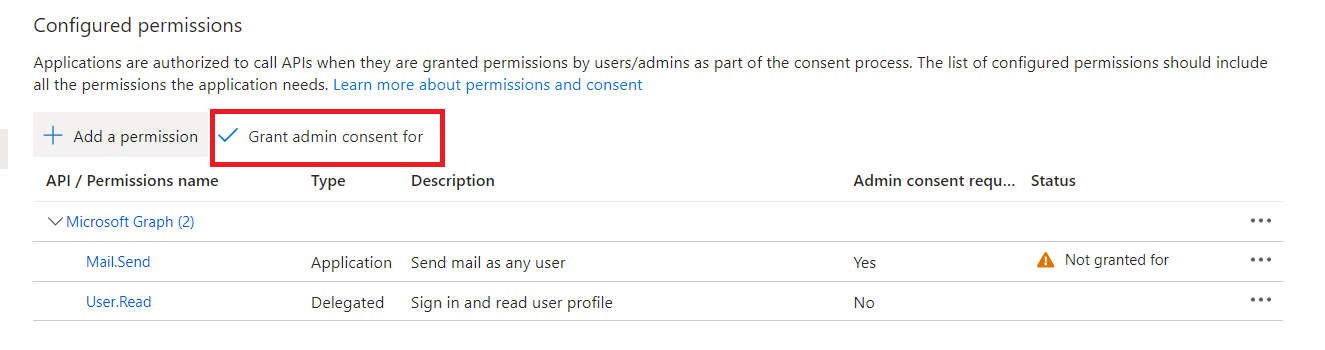
Click Grant admin consent for <YOUR ORGANIZATION>.
Once the permission has been granted you should see a green check.
To limit this permissions’ mailbox access we need to create an application access policy.
This can be done using the Exchange Online PowerShell module
Set the PowerShell Execution Policy:
Set-ExecutionPolicy RemoteSigned
To install the module:
Install-Module -Name ExchangeOnlineManagement
To start using the module:
Import-Module ExchangeOnlineManagement
Connect to Exchange Online using an administrator account:
Connect-ExchangeOnline -UserPrincipalName <USERNAME>
Create a mail-enabled security group which we can apply the application access policy:
New-DistributionGroup -Name "MyEmailApp" -Alias myemailapp -Type "Security"
Create the application access policy using the Application (client) ID:
New-ApplicationAccessPolicy -AppId <APPLICATION_CLIENT_ID> -PolicyScopeGroupId <GROUP EMAIL ADDRESS> -AccessRight RestrictAccess
Add the mailbox you want to send from to the group:
Add-DistributionGroupMember -Identity MyEmailApp -Member <SENDER_ADDRESS> -Confirm:$false
Now that the application has been registered and the appropriate permissions have been granted we can start interacting with the Microsoft Graph API
First we need to get an access_token.
httpService = new http(
     url = "https://login.microsoftonline.com/oauth2/v2.0/token",
     method = "POST"
);

httpService.addParam(
     type = "body",
     value = "client_id=<APPLICATION_CLIENT_ID>&scope=https%3A%2F%2Fgraph.microsoft.com%2F.default&client_secret=<CLIENT_SECRET>&grant_type=client_credentials"
);

results = httpService.send().getPrefix();
The results should look like this:
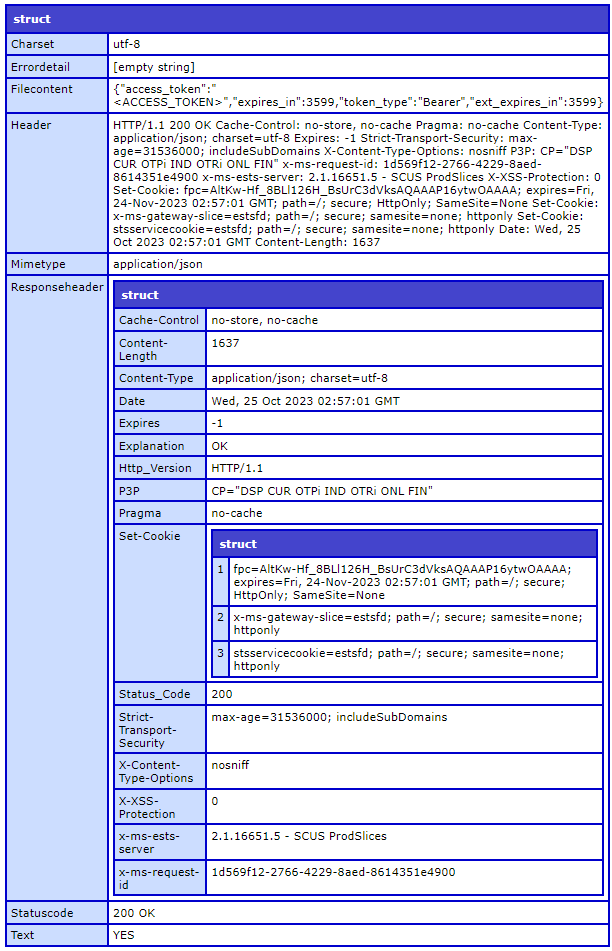
The Filecontent key should contain a JSON encoded string:
{
     "access_token": "<ACCESS_TOKEN>",
     "expires_in": 3599,
     "token_type": "Bearer",
     "ext_expires_in": 3599
}
The expires_in value is the time in seconds until the token expires.
You can reuse the same token for subsequent Microsoft Graph API requests until it expires.
Using the the access token we can now send an email using the sendMail API endpoint:
filecontent = deserializeJSON(results.filecontent);

httpService = new http(
     url = "https://graph.microsoft.com/v1.0/users/<SENDER_EMAIL>/sendMail",
     method = "POST"
);

httpService.addParam(
     type = "header",
     name = "Authorization",
     value = "Bearer #filecontent.access_token#"
);

httpService.addParam(
     type = "header",
     name = "Content-Type",
     value = "application/json"
);

body = {
     "message": {
          "subject": "Your subject",
          "body": {
               "contentType": "Text",
               "content": "Your message content"
          },
          "toRecipients": [{
               "emailAddress": {
                    "address": "to@someone.com"
               }
          }]
     },
     "saveToSentItems": false
};

httpService.addParam(
     type = "body",
     value = serializeJSON(body)
);

results = httpService.send().getPrefix();
The results.Statuscode will show 202 Accepted if the email was sent:

After manually applying an update to one of the ColdFusion servers I manage I started getting this error when opening the ColdFusion Administrator console:
The administrator module is not installed.
You can install module through CLI package manager(CF_ROOT/bin/cfpm.bat) by running the command : install administrator.
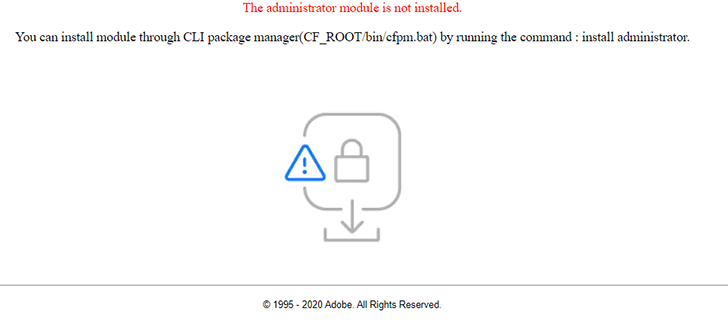
Executing the suggested command showed what appeared to be a successful install, but still received the same error.
I reviewed the ColdFusion update log {cfusion}\hf-updates\hf-XXXX-XXXXX-XXXXXX and found several module installs failed with this error:
An error has occurred while installing the package XXXXX. Exception : URI does not specify a valid host name: {Local Path To File}.jar
An old manual upgrade path was left in the packagesurl value within {cfusion}\lib\neo_updates.xml.
I was able to restore my pre-update snapshot backup, change neo_updates.xml back to the original value of https://www.adobe.com/go/coldfusion-packages and proceed with the manual update normally.
If the packagesurl value contains invalid/unescaped characters, you might also see this error in the update log:
Exception : Illegal character in opaque part at index X
If you’ve ever needed to use ColdFusion to manipulate Word documents, you might have tried a 3rd party library like Doc4J or Apache POI.
While these libraries are very robust I found them to be limiting in different ways. Apache POI lacks built-in mail merge capability (which to me seems very odd given the information below) and Doc4j threw an odd Jakarta error that I was not able to fix.
I also looked at paid for libraries like Apose, but the licensing costs were just too prohibitive
Finally I decided on direct OOXML manipulation.
This turned out to be much easier than I anticipated, once I learned that Office files like Word docx files are actually Zip archives!
Who knew!?!?!
So it’s possible to use the native cfzip tag to “open” the file.
<cfzip action="unzip" file="{Your Office Document File Path}" destination="{A temporary folder}" recurse="yes"/>
Once unzipped to a folder you will have a directory structure like this:

Within the Word subfolder there are several XML files. The document I am manipulating for the mail merge is document.xml
This file can be read into ColdFusion using xmlParse() and from there can be manipulated like any other XML object using ColdFusion’s native tags and commands.
I couldn’t find any “standard” way for altering the XML to merge data into the various template fields.
To get an idea of how Word does it I created a test Word document with a simple and complex mail merge field: Word Merge Fields.docx
Running this through a Word mail merge and then unzipping the resulting file and reviewing the document.xml for the “merged” document I found that simple merge fields (fldSimple) are completely replaced with the merged value while complex fields have a begin and end XML node delimiter that must be parsed and manipulated in specific ways.
In order to properly merge complex fields it’s necessary to determine if there is a separator XML node within the field. If so, the the node between the separator node and the end node are used as the value. If no separator node is found then the entire field is replaced with the merged value just as simple merge fields.
After updating the parsed XML it must be written back to the document.xml file:
<cffile action="write" file="{Path to document.xml}" output="#toString(CF XML object)#" charset="utf-8">
Once the document.xml file has been saved we need to rezip everything back into a Word docx file:
<cfzip action="zip" file="{Full path to resulting docx file}" source="{Folder containing unzipped contents}" recurse="yes"/>
Fully merged document:
Word Merge Fields – Merged.docx
So far I’ve only used this for mail merges, but I’m sure that is only scratching the surface.
I found that after changing the password for a MongoDB NoSQL DSN using ColdFusion Administrator you need to restart the ColdFusion Application service in Windows. Even changing to the correct password will cause a MongoDB authentication error:
Exception authenticating MongoCredential{mechanism=SCRAM-SHA-256, userName='{Your Username}', source='{Your Auth Source}', password=, mechanismProperties=} null
Command failed with error 18 (AuthenticationFailed): 'Authentication failed.' on server XXXXXXXXXXXXX:27017. The full response is {"ok": 0.0, "errmsg": "Authentication failed.", "code": 18, "codeName": "AuthenticationFailed"}
This error may be logged in the MongoDB server log:
{"t":{"$date":"2021-11-08T14:39:07.067-06:00"},"s":"I", "c":"ACCESS", "id":20249, "ctx":"conn122","msg":"Authentication failed","attr":{"mechanism":"SCRAM-SHA-256","speculative":false,"principalName":"{Your Username}","authenticationDatabase":"{Your Auth Source}","remote":"XXX.XXX.XXX.XXXX:51204","extraInfo":{},"error":"AuthenticationFailed: SCRAM authentication failed, storedKey mismatch"}}
In ColdFusion 2021 I encountered a new wrinkle when using CFHTTP. The url attribute must contain no leading or trailing spaces:
<cfhttp url="#trim(someurlvariable)#">
In my case the value of someurlvariable was coming from a database.
Another potential bug found within ColdFusion 2021 with this error:
Could not initialize class cfApplication2ecfmXXXXXXXXX
Interestingly the TYPE of error was: java.lang.NoClassDefFoundError
The class name cfApplication2ecfmXXXXXXXXX indicated to me that it was an issue with the saved class files in {CFRoot}\cfusion\wwwroot\WEB-INF\cfclasses
The file cfApplication2ecfmXXXXXXXXX.class did exist in the \cfclasses folder
The only working solution I’ve found so far is to disable the “Save class files” option using the ColdFusion administrator console (Server Settings > Cache > Uncheck Save class files)
There seems to be conflicting recommendations about this settings, however the ColdFusion administrator console states that the option should be enabled for production servers.
My own testing has revealed the primary drawback to be an initial hit on the server CPU after rebooting or resetting the ColdFusion service.
After the initial startup hit the server seems to function normally.
DateFormat() in ColdFusion 2021 is now case-sensitive.
This no longer produces the desired result:
<cfoutput>#dateFormat("11/21/2020 2:38:16 PM","MM/DD/YYYY")#</cfoutput>
Pre-ColdFusion 2021:
11/21/2020
ColdFusion 2021:
11/326/2020
Note that ColdFusion 2021 displays the day of the year
To fix:
<cfoutput>#dateFormat("11/21/2020 2:38:16 PM","mm/dd/yyyy")#</cfoutput>
Adobe has added a JVM flag that can adjust this behavior:
-Dcoldfusion.datemask.useDasdayofmonth which defaults to FALSE
https://helpx.adobe.com/coldfusion/cfml-reference/coldfusion-functions/functions-c-d/DateFormat.html
Since Adobe is defaulting to FALSE it's probably best to update your code accordingly.
I ran into an interesting change in ColdFusion 2018 with regard to <cfdump>
The output produced by <cfdump> suddenly lacked formatting and any ability to collapse the tree nodes.
This sample code:
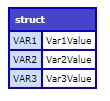
<cfcomponent>
	<cffunction name="test" access="public" returntype="any" output="false">
		<cfset var test = structNew()>
		<cfset test.var1 = "Var1Value">
		<cfset test.var2 = "Var2Value">
		<cfset test.var3 = "Var3Value">
		<cfdump var="#test#"><cfabort>
	</cffunction>
</cfcomponent>
Produces this output:
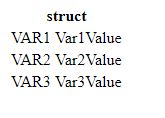
The above is just an example, but dumping anything remotely complex such as a query or CFC resulted in near unreadable output.
As I do with any seemingly odd ColdFusion behavior I start searching for others experiencing the same behavior.
There’s not much out there.
What is available is very dated and not applicable to my problem.
With nothing much to go on I researched and tried many possibilities until I stumbled on the solution.
The problem seems to be with how ColdFusion 2018 is now using or interpreting the output attribute of <cffunction>.
I’ve always set it to FALSE by default as I typically want my functions to RETURN output rather than produce it.
In ColdFusion 2018 this appears to now prevent <cfdump> from inserting the necessary CSS and JavaScript to provide the formatted output.
Simply changing the value to TRUE (or omitting) shows the correctly formatted output:
I guess just another odd quirk in ColdFusion 2018.
A side effect of output="true" or not setting the attribute is that calling the function inside a <cfoutput> tag will produce proceeding spaces.
Add output="false" after debugging or switch to cfscript.
Today I began migrating some of our applications to ColdFusion 2018 (from ColdFusion 2016).
Things went pretty smoothly until I ran into this error:
Could not find the ColdFusion component or interface XXX.XXX.mycfc"
Where “XXX.XXX.mycfc” is a ColdFusion component.
In my case the component definitely exists and was in the path where it was being instantiated.
After a little troubleshooting and head scratching I decided to simply try adding a mapping in Application.cfc.
Magically the component could be instantiated and the application runs as it always has.
I have no idea why a mapping is now required in the latest version of ColdFusion.
An information technology professional with twenty five years experience in systems administration, computer programming, requirements gathering, customer service, and technical support.