As part of a recent project I needed to lookup and export data from Oracle NetSuite using PowerShell.
It took me several hours of spinning my wheels on this problem, but I was finally able to connect. I’m writing this post in hopes that I can save someone else a little time and hair pulling.
The first thing you’ll need to do is access NetSuite using an account that has the administrator role or the Integration Application permission assigned.
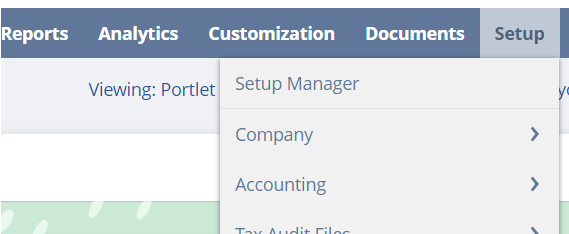
From the NetSuite application Dashboard you should see a Setup item in the top/main menu:
Click the main Setup link in the menu to view the Setup Manager:
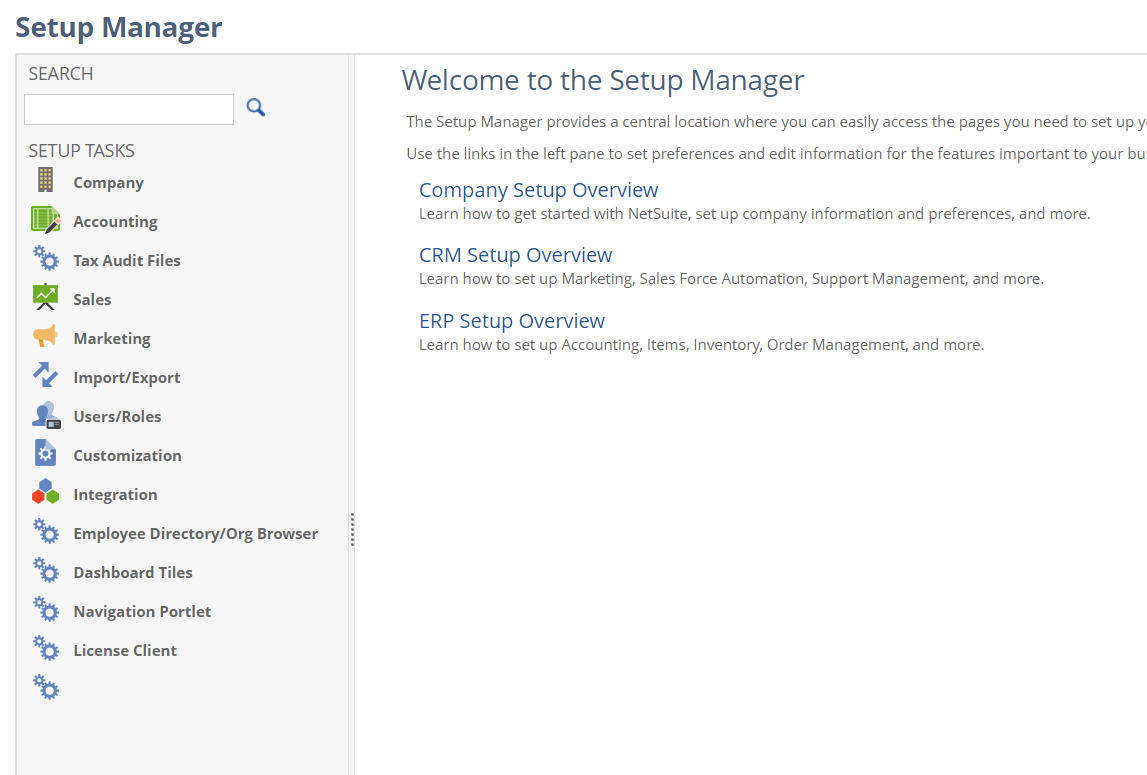
Click on Company » Enable Features » SuiteCloud
Toward the bottom under SuiteTalk (Web Services) check the REST WEB SERVICES box (SOAP can also be enabled here):
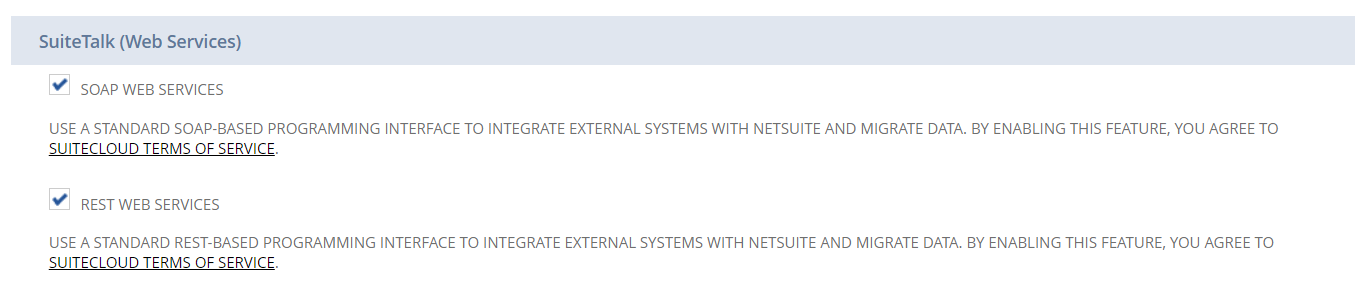
Click Save.
While still in Setup Manager click Integration » Manage Integrations:

Click New, enter an application NAME, make sure the STATE is enabled.
You can uncheck all of the Token-based Authentication options
Within the OAuth 2.0 section, check CLIENT CREDENTIALS (MACHINE TO MACHINE) GRANT and REST WEB SERVICES under SCOPE
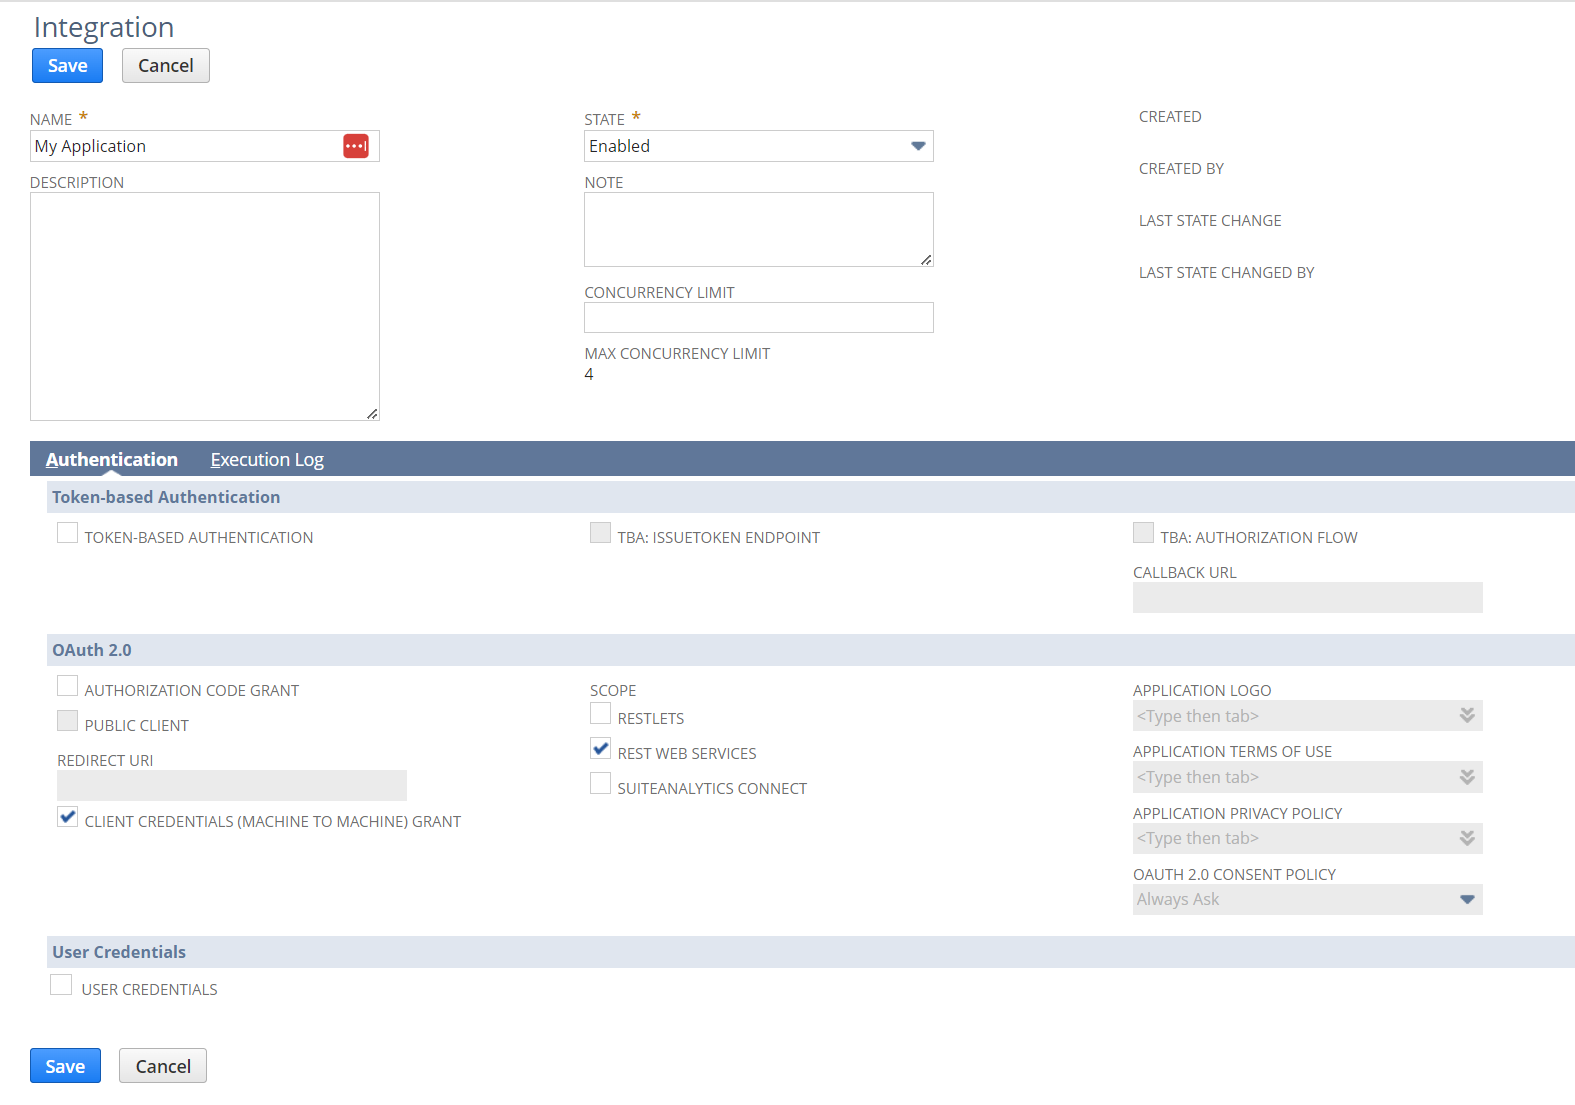
Click Save.
After saving you’ll be presented with a CONSUMER KEY / CLIENT ID AND CONSUMER SECRET / CLIENT SECRET:
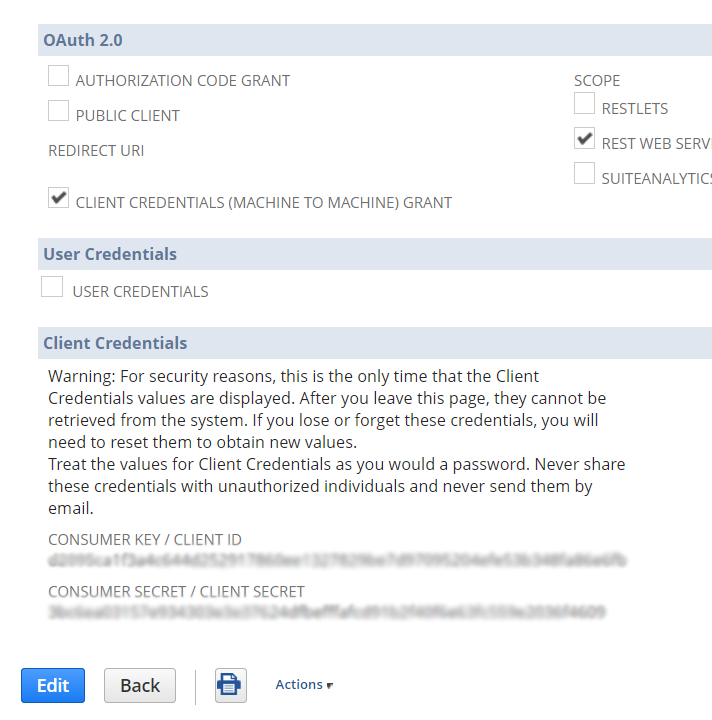
This information is only presented one time so you’ll need to write it down.
Now we need to create a certificate that will be used to sign our REST requests.
For this I used OpenSSL, but any method for generating a valid x509 certificate should work.
Here is the CMD to generate a local certificate:
openssl req -x509 -newkey rsa:3072 -keyout "{Output Path}\private.pem" -out "{Output Path}\public.pem" -days 365 -nodes
You’ll be prompted to enter the certificate information; you can accept the default values by simply hitting ENTER.
While still in Setup Manager click Integrations » OAuth 2.0 Client Credentials Setup:

Click Create New.

Select an appropriate user account for the ENTITY. The roles and permissions assigned to this user will then populate the ROLE list.
Select an appropriate ROLE assigned to the user. This will affect what data and operations are available via the REST Web Services.
Select the APPLICATION that was previously setup in Manage Integrations
Choose the public key file (public.pem) that was previously created for the CERTIFICATE
Click Save.
Once the credentials have been saved there will be a CERTIFICATE ID available on the main setup screen. This will be used later in our REST requests.
At this point everything should be setup within NetSuite.
In order to use the REST Web Services you must first acquire an access_token
This is done via a POST request to the API’s token endpoint:
https://<accountID>.suitetalk.api.netsuite.com/services/rest/auth/oauth2/v1/token
To accomplish this we’ll need to work with JSON Web Tokens (JWTs).
There are some good PowerShell libraries for working with JWT such as Posh-Jwt, however I wanted a deeper understanding of the technology.
In order to create a valid JWT we need to encode some of the configuration information and then appropriately sign the request.
First create and encode the header:
# typ is always JWT
# alg is the Algorithm use to sign the request, others are supported, but RS256 is all that I could get to work
# kid is the certificate ID provided on the OAuth 2.0 Client Credentials Setup screen, we use the private key to sign later
[hashtable]$header = @{
     "typ" = "JWT";
     "alg" = "RS256";
     "kid" = "[Certificate ID from OAuth 2.0 Client Credentials Setup]";
}

# Serialize to JSON, Convert to Base64 string, make Base64 string URL safe
[string]$encodedHeader = [Convert]::ToBase64String([System.Text.Encoding]::UTF8.GetBytes($(ConvertTo-Json $header))) -replace '\+','-' -replace '/','_' -replace '='
Next we need to create and encode the JWT payload:
# iss is the Client ID provided during the Integration Setup, the information is only provided once immediately after setup
# scope is the comma delimited list of possible services:  restlets, rest_webservices, suite_analytics
# aud is always the token endpoint
# exp is the date the JWT expires (60 minutes is the max) in Epoch/Unix numeric time, note this is NOT the expiration of the access_token
# iat is the date the JWT was issued (current date/time) in Epoch/Unix numeric time
[hashtable]$payload = @{
     "iss" = "[Client ID provided during Integration Setup]";
     "scope" = "rest_webservices";
     "aud" = "https://<accountID>.suitetalk.api.netsuite.com/services/rest/auth/oauth2/v1/token";
     "exp" = ([System.DateTimeOffset]$((Get-Date).AddSeconds(3600))).ToUnixTimeSeconds();
     "iat" = ([System.DateTimeOffset]$(Get-Date)).ToUnixTimeSeconds()
}

# Serialize to JSON, Convert to Base64 string, make Base64 string URL safe
[string]$encodedPayload = [Convert]::ToBase64String([System.Text.Encoding]::UTF8.GetBytes($(ConvertTo-Json $payload))) -replace '\+','-' -replace '/','_' -replace '='
Now we need to sign the JWT:
# Combine header and payload
[string]$baseSignature = "$encodedHeader.$encodedPayload"
[byte[]]$byteSignature = [System.Text.Encoding]::UTF8.GetBytes($baseSignature)

# Load certificate
[System.Security.Cryptography.X509Certificates.X509Certificate2]$signingCertificate = [System.Security.Cryptography.X509Certificates.X509Certificate2]::CreateFromPemFile("<File path to public.pem>","<File path to private.pem>")

# Sign using private key
[byte[]]$byteSignedSignature = $signingCertificate.PrivateKey.SignData($byteSignature,[System.Security.Cryptography.HashAlgorithmName]::SHA256,[System.Security.Cryptography.RSASignaturePadding]::Pkcs1)

# Convert to Base64 string and make Base64 string URL safe
[string]$signedSignature = [Convert]::ToBase64String($byteSignedSignature) -replace '\+','-' -replace '/','_' -replace '='
With the JWT token properly configured and signed we’re ready to request an access_token from the API’s token endpoint and then use it to access the API’s customer endpoint.
# grant_type is always client_credentials
[string]$grant_type = "client_credentials"

# client_assertion_type is always urn:ietf:params:oauth:client-assertion-type:jwt-bearer, needs to be URL encoded
[string]$client_assertion_type = [System.Web.HttpUtility]::UrlEncode("urn:ietf:params:oauth:client-assertion-type:jwt-bearer")

# client_assertion is a combination of the $baseSignature and $signedSignature
[string]$client_assertion = "$baseSignature.$signedSignature"

# send access_token request
$response = Invoke-WebRequest `
                 -Uri "https://<accountID>.suitetalk.api.netsuite.com/services/rest/auth/oauth2/v1/token" `
                 -Method "POST" `
                 -Body "grant_type=$grant_type&client_assertion_type=$client_assertion_type&client_assertion=$client_assertion" `
                 -Headers @{"Content-Type"="application/x-www-form-urlencoded";} `
                 -UseBasicParsing

# should get a JSON response body
if ($null -ne $response `
    -and (Test-Json $response.Content)) {
     [hashtable]$token = ConvertFrom-Json $response.Content -AsHashtable
     if ($token.ContainsKey("access_token") `
         -and $token["access_token"].Length -gt 0) {

         # now we can use the access_token in subsequent requests via the Authorization header
         $response = Invoke-WebRequest `
                         -Uri "https://<accountID>.suitetalk.api.netsuite.com/services/rest/record/v1/customer/<id>" `
                         -Method "GET" `
                         -Headers @{"Authorization"="Bearer $($token["access_token"])";} `
                         -UseBasicParsing

         # Convert Byte[] to JSON string, then convert JSON to object
         Write-Output (ConvertFrom-Json ([System.Text.Encoding]::UTF8.GetString($response.Content)))
     }
}
Click here for full script.
Official REST API Developer Guide: https://docs.oracle.com/en/cloud/saas/netsuite/ns-online-help/book_1559132836.html#SuiteTalk-REST-Web-Services-API-Guide
In Windows (not sure of *nix OS) the GPG command-line has an obscure switch necessary in order to use the ‐‐passphrase argument: ‐‐pinentry-mode (https://gnupg.org/documentation/manuals/gpgme/Pinentry-Mode.html)
Example:
gpg ‐‐pinentry‐mode loopback ‐‐batch ‐‐yes ‐‐passphrase "<PassPhrase>" "<File>"
Referencing a PSObject property with special characters is pretty easy:
$var = $psobject."Property With Space"
In order to reference properties that include special characters dynamically:
$propertyname = "Property With Space"
$var = $psobject.($propertyname)
This post is really more about the potential problems one might encounter using Send-MailMessage cmdlet in PowerShell to connect and send email via Office 365.
First a quick example:
[SecureString]$o365Password = ConvertTo-SecureString "Your Office 365 Account Password" -AsPlainText -Force
[PSCredential]$o365Credentials = New-Object System.Management.Automation.PSCredential("Your Office 365 Account Username",$o365Password)
Send-MailMessage `
  -Subject "Your Subject" `
  -Body "Your email message" `
  -To "toSomeone@somewhere.com" `
  -From "fromSomeone@somewhereelse.com" `
  -SmtpServer "outlook.office365.com" `
  -Port 587 `
  -Credential $o365Credentials `
  -UseSsl
If the above settings are set correctly the email should be sent.
Some errors you may encounter:
Send-MailMessage : The SMTP server requires a secure connection or the client was not authenticated. The server response was: 5.7.57 SMTP; Client was not authenticated to send
anonymous mail during MAIL FROM [XXXXXXXXXXXXXXX.XXXXXXXX.prod.outlook.com]
Send-MailMessage : Unable to connect to the remote server
While trying to automate the creation of new IIS websites using PowerShell I needed a script to create IIS virtual directories with a specific login (i.e. Connect As)
After several hours of searching and trying various solutions I finally arrived at this:
$sitename = "My Website Name"
$virtualdirectory = "virtual1"
$virtualdirectorypath = "C:\My Virtual Path"
$username = "username1"
$password = "password1"

New-WebVirtualDirectory -Site $sitename -Name $virtualdirectory -PhysicalPath $virtualdirectorypath

Set-WebConfigurationProperty "system.applicationHost/sites/site[@name='$sitename']/application[@path='/']/virtualDirectory[@path='$virtualdirectory']" -name userName -value $username

Set-WebConfigurationProperty "system.applicationHost/sites/site[@name='$sitename']/application[@path='/']/virtualDirectory[@path='$virtualdirectory']" -name password -value $password
I tried several path alternatives, however the XPath queries listed in the snippet are the only iteration that worked.
Hope this saves someone else a little time.
An information technology professional with twenty five years experience in systems administration, computer programming, requirements gathering, customer service, and technical support.