Send O365 email using ColdFusion and Microsoft Graph
October 24, 2023
With SMTP Relay being increasingly phased out within Office/Exchange 365 I decided to migrate some of our application email to Microsoft Graph.
In order to use Microsoft Graph API to send email you’ll need to have an Exchange 365 account and a licensed user/inbox.
To access the Microsoft Graph API your program will need to authenticate itself using OAuth.
The first step is to register your application in Azure AD.
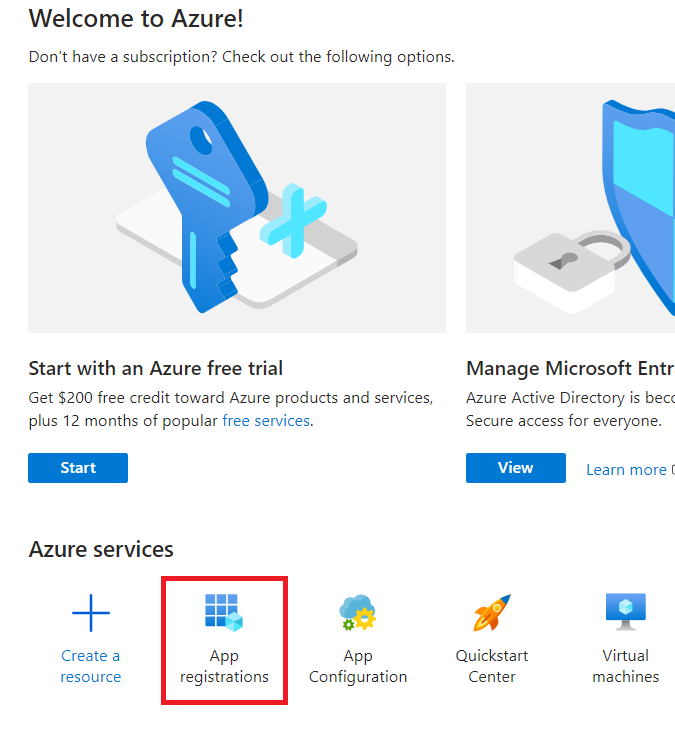
Open the Azure AD Portal: https://portal.azure.com/
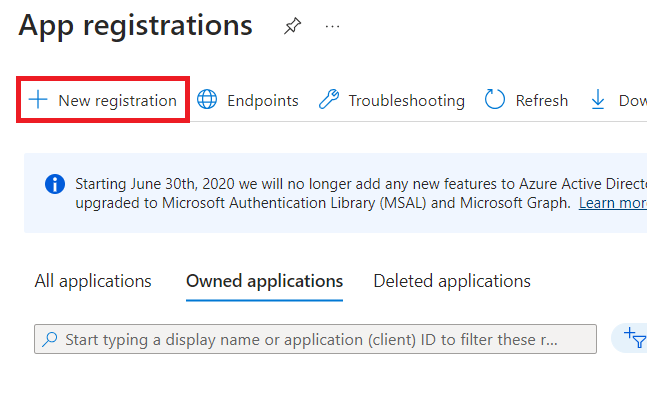
Click App Registrations.
Click New registration.
Enter the Name of your application. Leave everything else default.
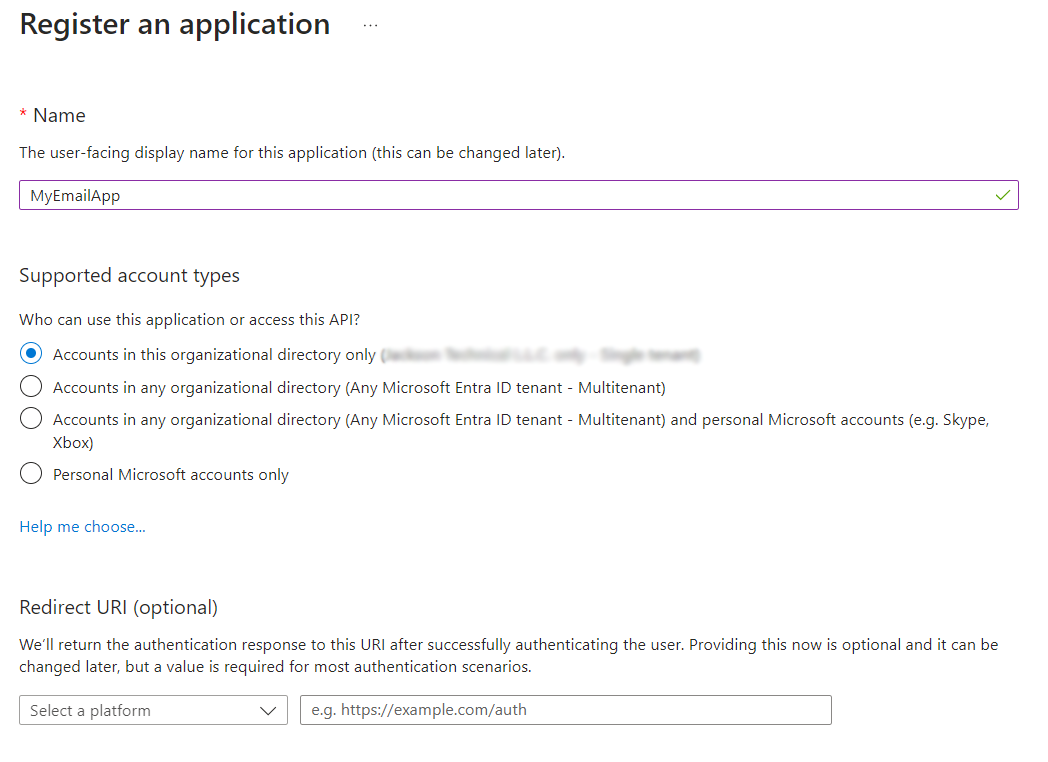
Click Register.
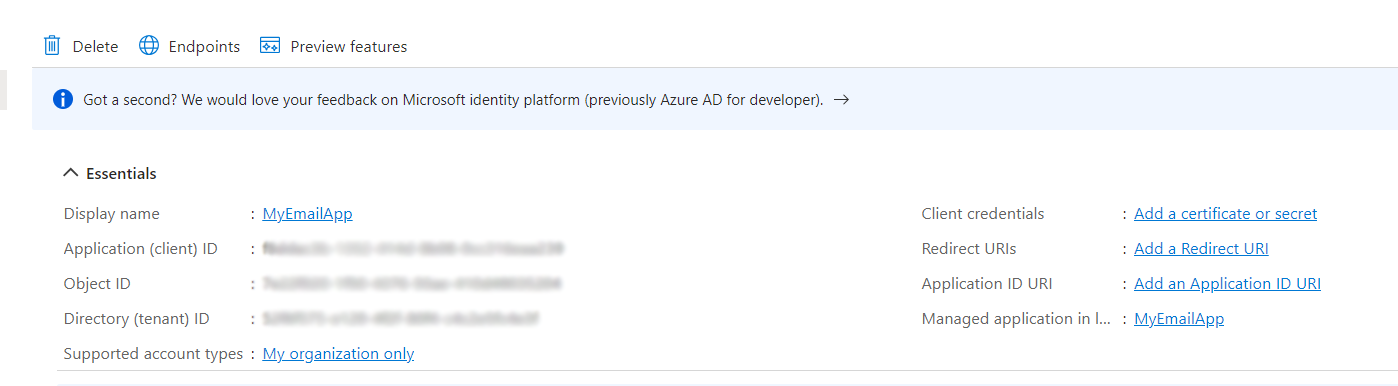
After registering your application, write down the Application (client) ID and the Directory (tenant) ID.
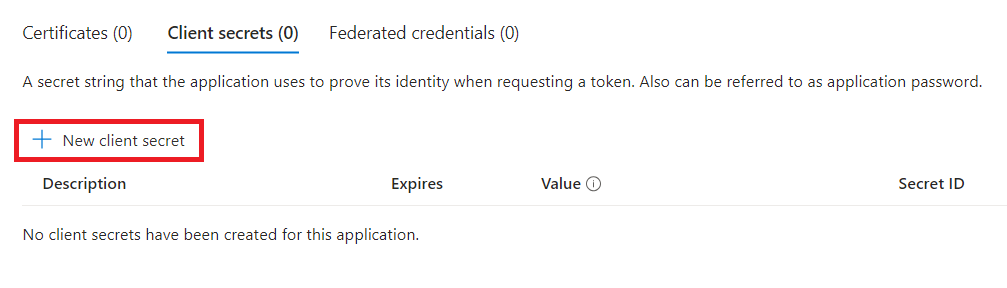
We now need to create a “secret” for generating OAuth access tokens.
Click Certificates & secrets.

Click New client secret.
Enter a Description and select an Expires value.
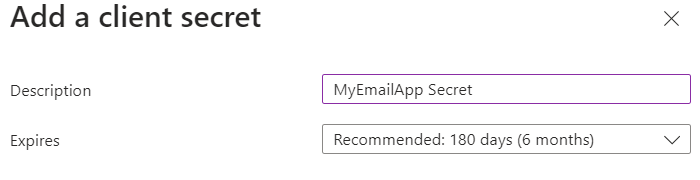
Click Add.
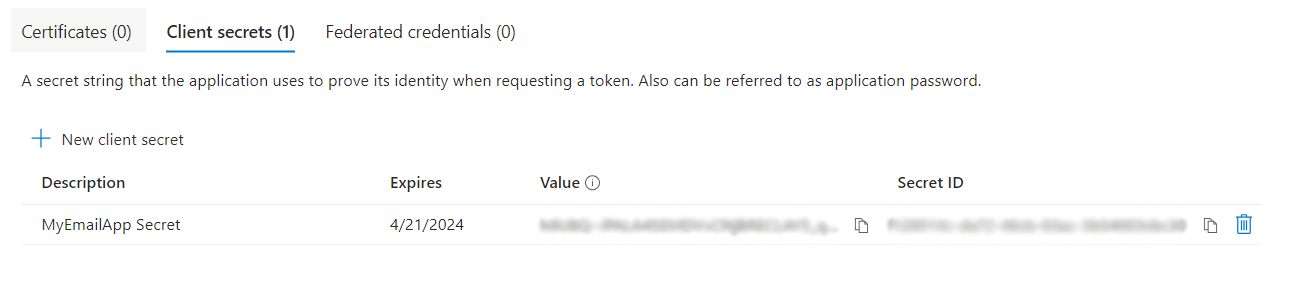
Write down the Value immediately because it will only be displayed once.
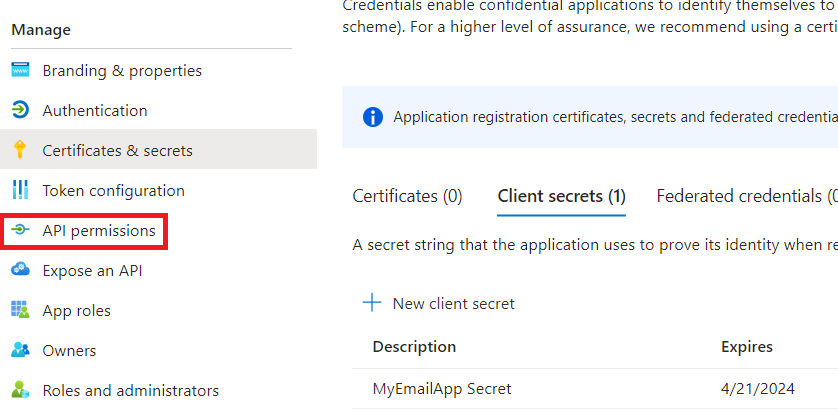
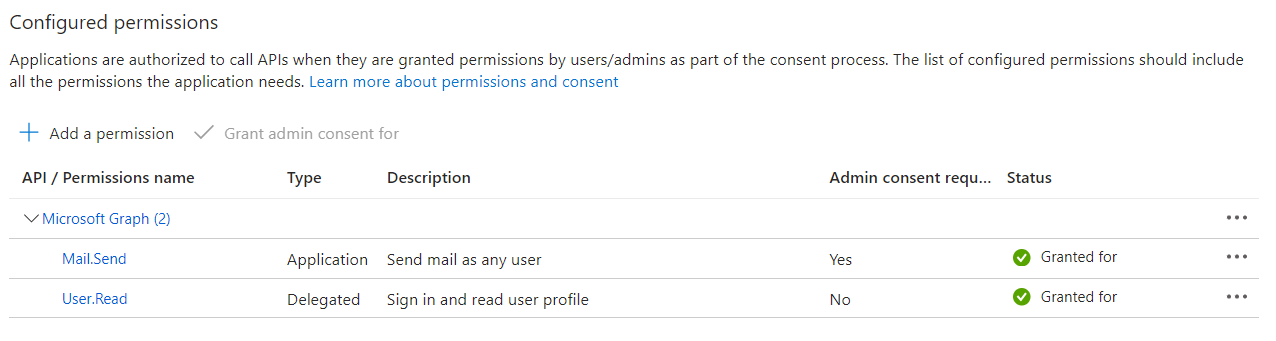
Now we need to assign the app the appropriate API permissions.
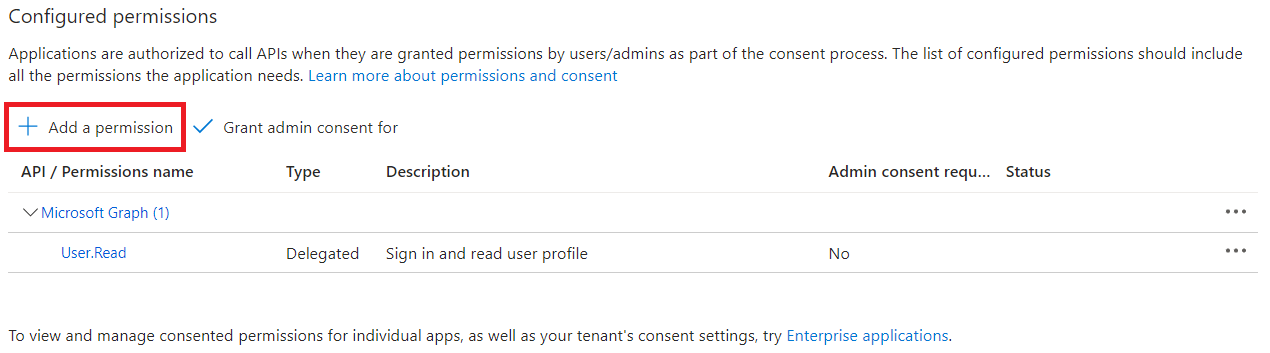
Click API permissions.
Click Add a permission.
Microsoft Graph.
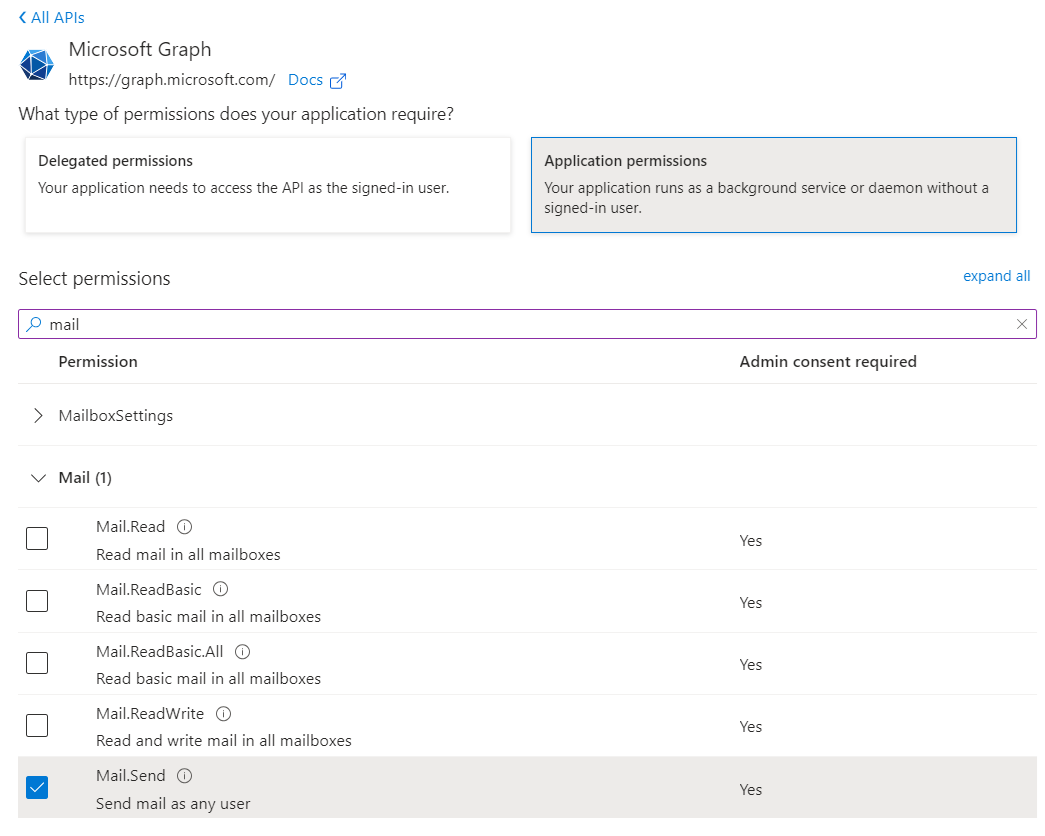
Application permissions.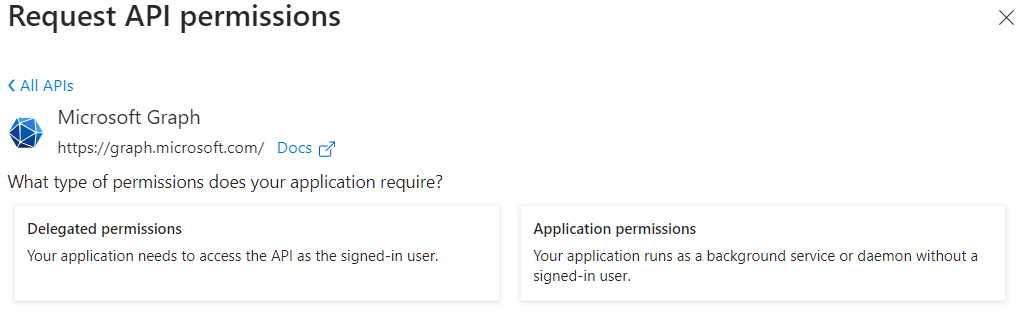
Search for Mail and select Mail.Send.
Click Add permissions.
An administrator will need to grant the permission for the entire organization.
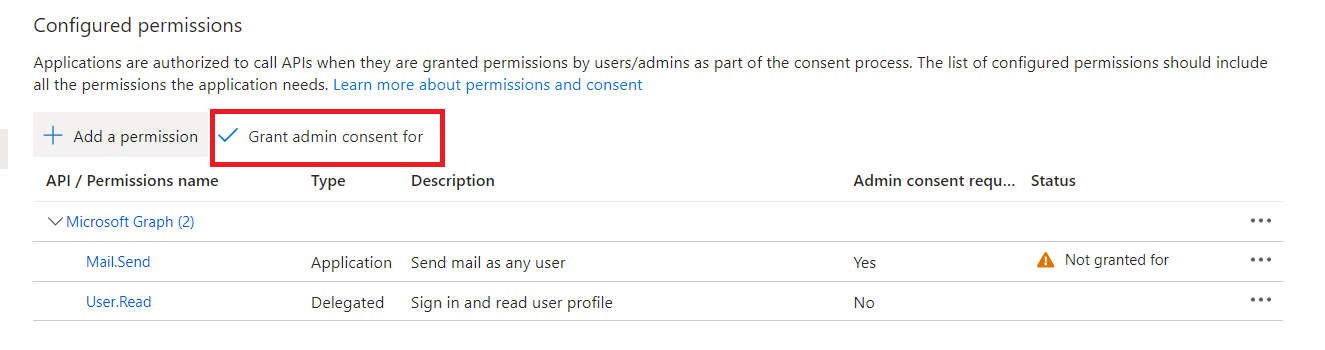
Click Grant admin consent for <YOUR ORGANIZATION>.
Once the permission has been granted you should see a green check.
To limit this permissions’ mailbox access we need to create an application access policy.
This can be done using the Exchange Online PowerShell module
Set the PowerShell Execution Policy:
Set-ExecutionPolicy RemoteSigned
To install the module:
Install-Module -Name ExchangeOnlineManagement
To start using the module:
Import-Module ExchangeOnlineManagement
Connect to Exchange Online using an administrator account:
Connect-ExchangeOnline -UserPrincipalName <USERNAME>
Create a mail-enabled security group which we can apply the application access policy:
New-DistributionGroup -Name "MyEmailApp" -Alias myemailapp -Type "Security"
Create the application access policy using the Application (client) ID:
New-ApplicationAccessPolicy -AppId <APPLICATION_CLIENT_ID> -PolicyScopeGroupId <GROUP EMAIL ADDRESS> -AccessRight RestrictAccess
Add the mailbox you want to send from to the group:
Add-DistributionGroupMember -Identity MyEmailApp -Member <SENDER_ADDRESS> -Confirm:$false
Now that the application has been registered and the appropriate permissions have been granted we can start interacting with the Microsoft Graph API
First we need to get an access_token.
httpService = new http(
     url = "https://login.microsoftonline.com/oauth2/v2.0/token",
     method = "POST"
);

httpService.addParam(
     type = "body",
     value = "client_id=<APPLICATION_CLIENT_ID>&scope=https%3A%2F%2Fgraph.microsoft.com%2F.default&client_secret=<CLIENT_SECRET>&grant_type=client_credentials"
);

results = httpService.send().getPrefix();
The results should look like this:
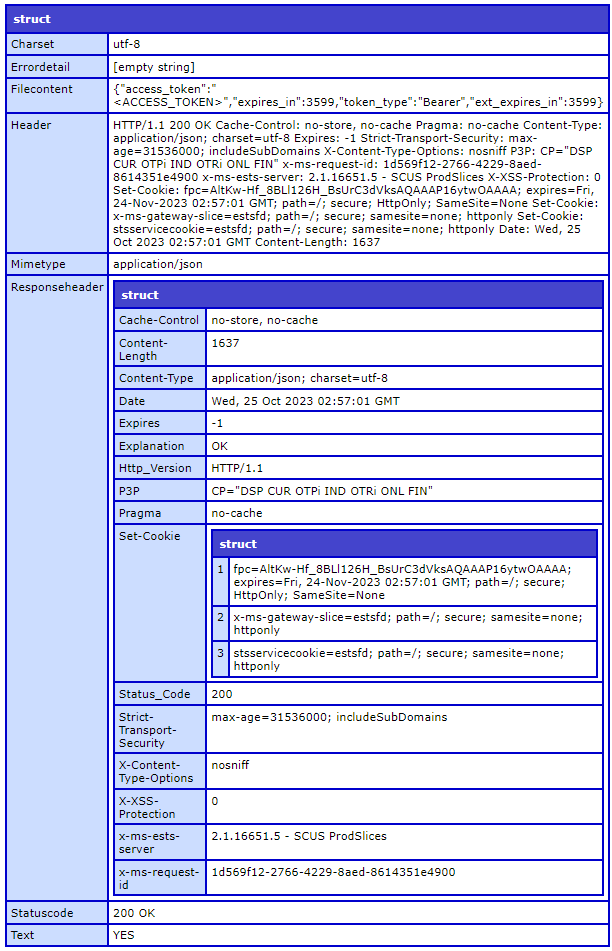
The Filecontent key should contain a JSON encoded string:
{
     "access_token": "<ACCESS_TOKEN>",
     "expires_in": 3599,
     "token_type": "Bearer",
     "ext_expires_in": 3599
}
The expires_in value is the time in seconds until the token expires.
You can reuse the same token for subsequent Microsoft Graph API requests until it expires.
Using the the access token we can now send an email using the sendMail API endpoint:
filecontent = deserializeJSON(results.filecontent);

httpService = new http(
     url = "https://graph.microsoft.com/v1.0/users/<SENDER_EMAIL>/sendMail",
     method = "POST"
);

httpService.addParam(
     type = "header",
     name = "Authorization",
     value = "Bearer #filecontent.access_token#"
);

httpService.addParam(
     type = "header",
     name = "Content-Type",
     value = "application/json"
);

body = {
     "message": {
          "subject": "Your subject",
          "body": {
               "contentType": "Text",
               "content": "Your message content"
          },
          "toRecipients": [{
               "emailAddress": {
                    "address": "to@someone.com"
               }
          }]
     },
     "saveToSentItems": false
};

httpService.addParam(
     type = "body",
     value = serializeJSON(body)
);

results = httpService.send().getPrefix();
The results.Statuscode will show 202 Accepted if the email was sent:

0 Comments